Sticker assistant
The sticker assistant is available starting with the Business plan. Use it to create, edit, publish, or delete label templates.
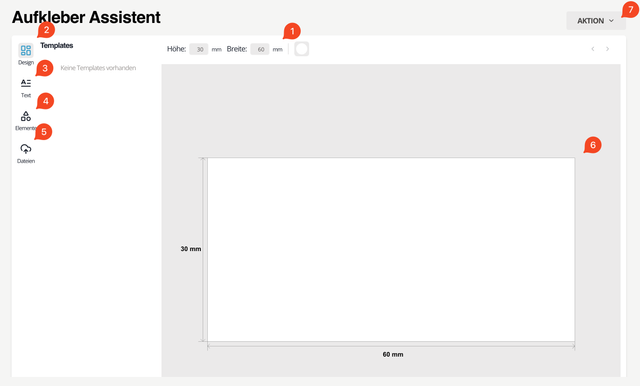
Fig. 1: Sticker assistant
Menu elements of the sticker assistant
- Label dimensions in mm
- Design menu
- Text tools
- Element selection
- File upload and selection
- Label workspace
- Actions
Create a label step by step
To create a new label template, click Action (7) in the upper-right corner and select “New template.” You can then place any number of content objects such as image or text fields, placeholders, or shapes on the workspace.
Step 1 – Define dimensions
Enter the label size in millimeters under (1). The minimum dimension is 9 mm, the maximum size is 500 mm.
Step 2 – Place, format, and adjust content objects
Open the Element selection (4), choose the DataMatrix code under “Dynamic elements,” and place it on the workspace (6).
Open the text tools (3), select dynamic text or a free text field, and position it on the workspace as well. Dynamic text fields are automatically populated with the corresponding database values when you print. If you have created custom fields, they are also available—except for the Checkbox type.
Format text, adjust style and alignment
As soon as you click a text field, the editing menu appears. You can adjust font size, color, style (bold, italic, underline, strikethrough), and the font family. Alignment can be set to left, centered, or right.

Fig. 2: Edit text
Resize text and shapes
When you click a text or shape, a blue frame with handles appears on the corners and edges. Drag the handles to change size or rotation.
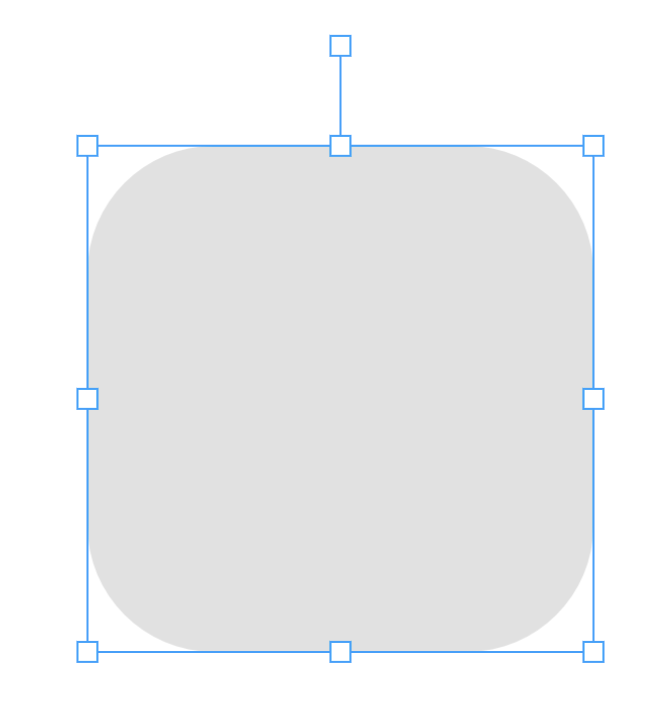
Fig. 3: Object selected
Step 3 – Publish the label
Open the design menu (2). All existing templates are listed there. Hover the desired template. A three-dot menu (…) appears. Click it and choose “Publish.” The template is now released for use.
Create a new label template
Click Action (7) and choose “New template.”
Delete a label template
Open the design menu (2), click the template you want to delete, open the three-dot menu, and choose “Delete.” The template is removed.
Additional editing options
Copy and paste
Right-click an object and choose “Copy.” Then click the workspace and choose “Paste” to place the object again.
Lock or unlock object position
You can lock an object to prevent accidental changes. Right-click the object → “Lock.” To unlock: right-click → “Unlock.”
Upload files
Use the upload function to upload up to 10 files at once. The total size may be up to 64 MB, a single file up to 8 MB. All uploaded files are available only within the respective template.
Use colors
Choose a color for an object
Select an object (1) and click the color circle (2). You will see the colors currently in use. The object’s current color (3) appears on the far left. Choose one of the existing colors or add a new color.
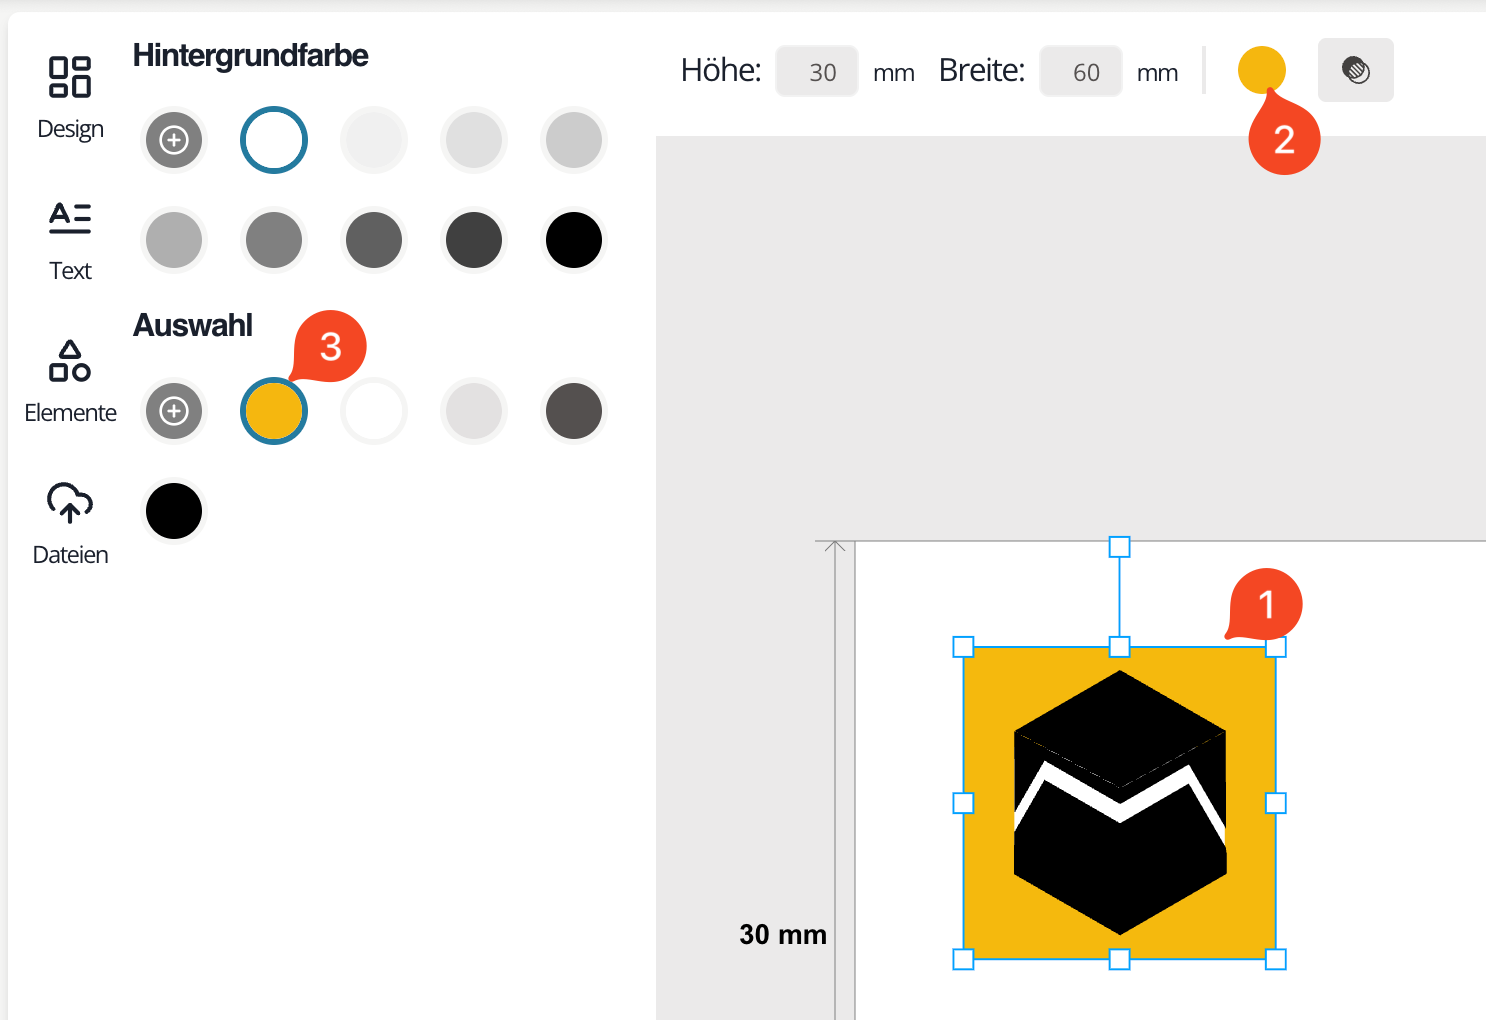
Fig. 4: Choose a color for an object
Choose a background color
Click the background (1) and then the icon to change the background color (2). Select an existing color (3) or add a new one.
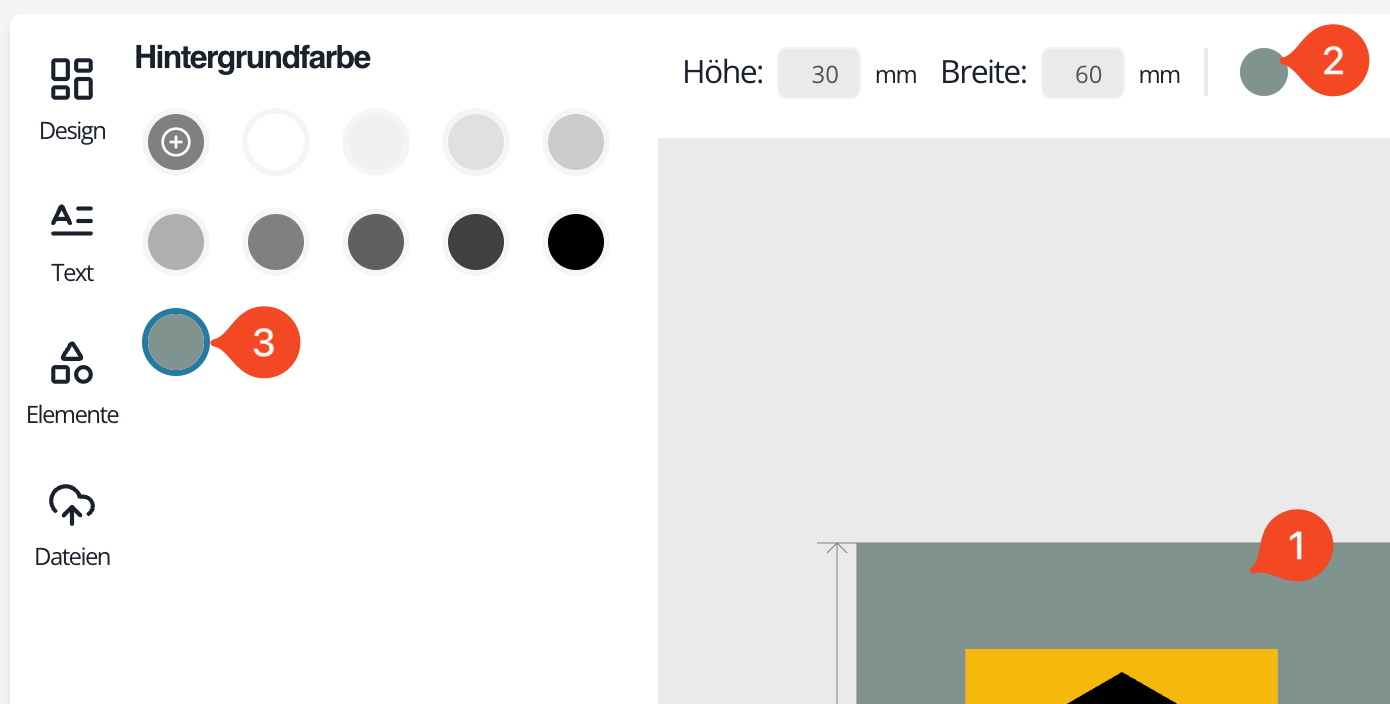
Fig. 5: Change the background color
Add a new color
You can add new colors for objects and the background. Click the plus icon (1) in the open color menu.

Fig. 6: Plus icon – add a new color
Pick a color in the color area (2) or enter your own values (3). Different browsers use different color pickers, so the layout and input options may vary. You can enter RGB, HSL, or HEX values.
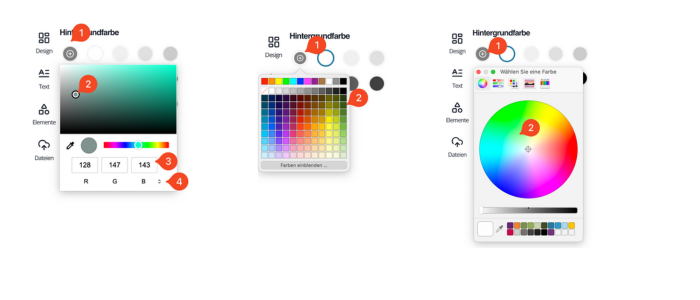
Fig. 7: Add a new color or enter color values – from left to right depending on browser: Chrome, Safari, Firefox
Adjust opacity
Select an object (1). Click the opacity icon (2) and adjust the value with the slider (3).
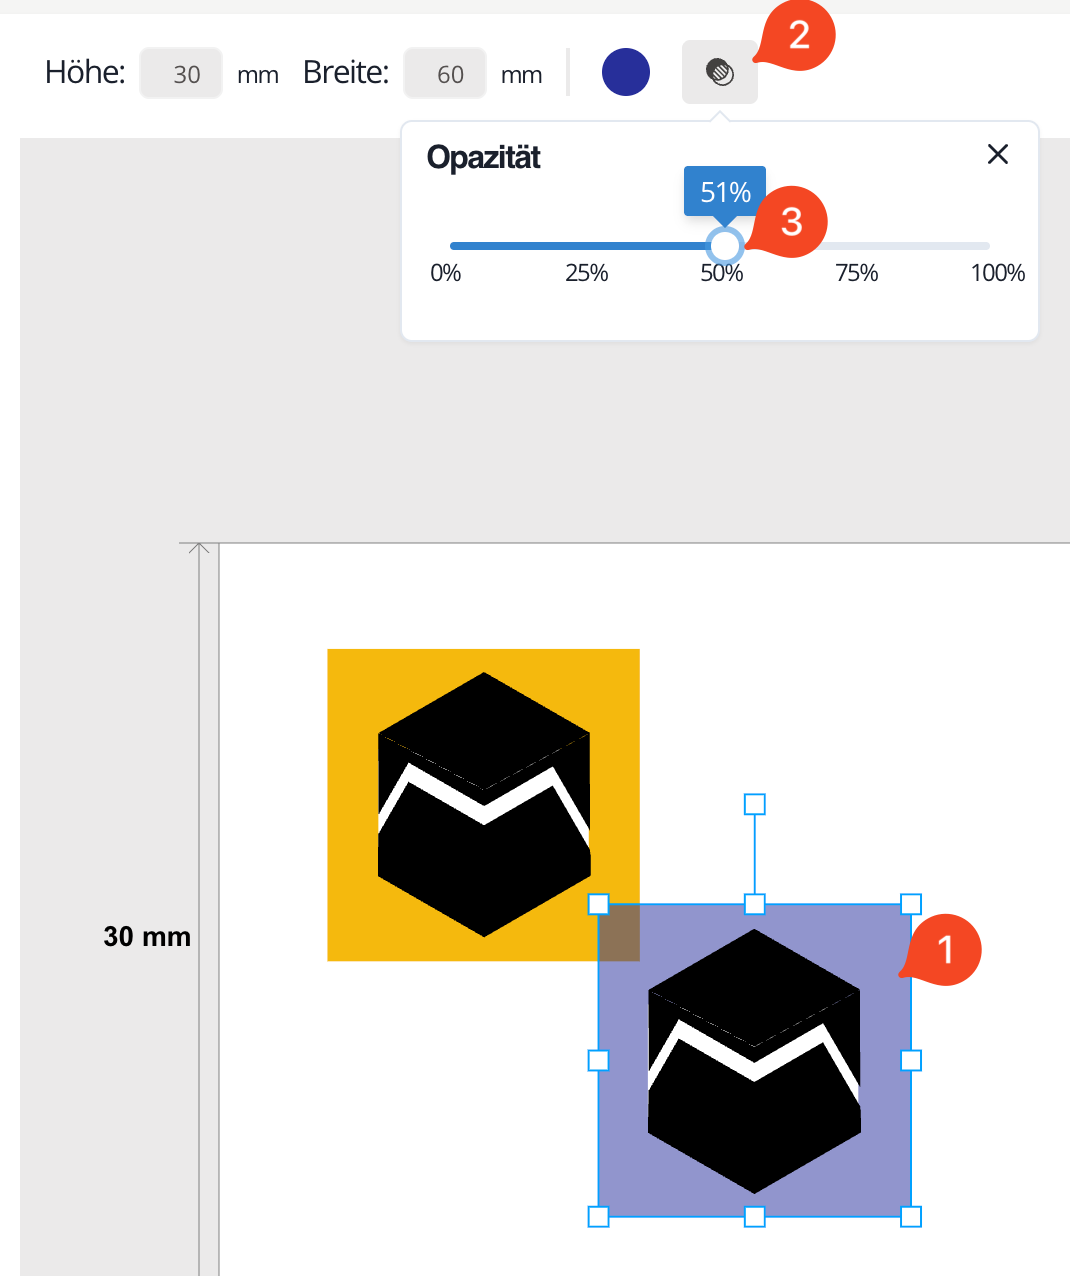
Fig. 8: Set opacity
Change the stacking order
Each object in the sticker assistant resides on its own layer. The first object you create is at the bottom; newer objects stack above it.
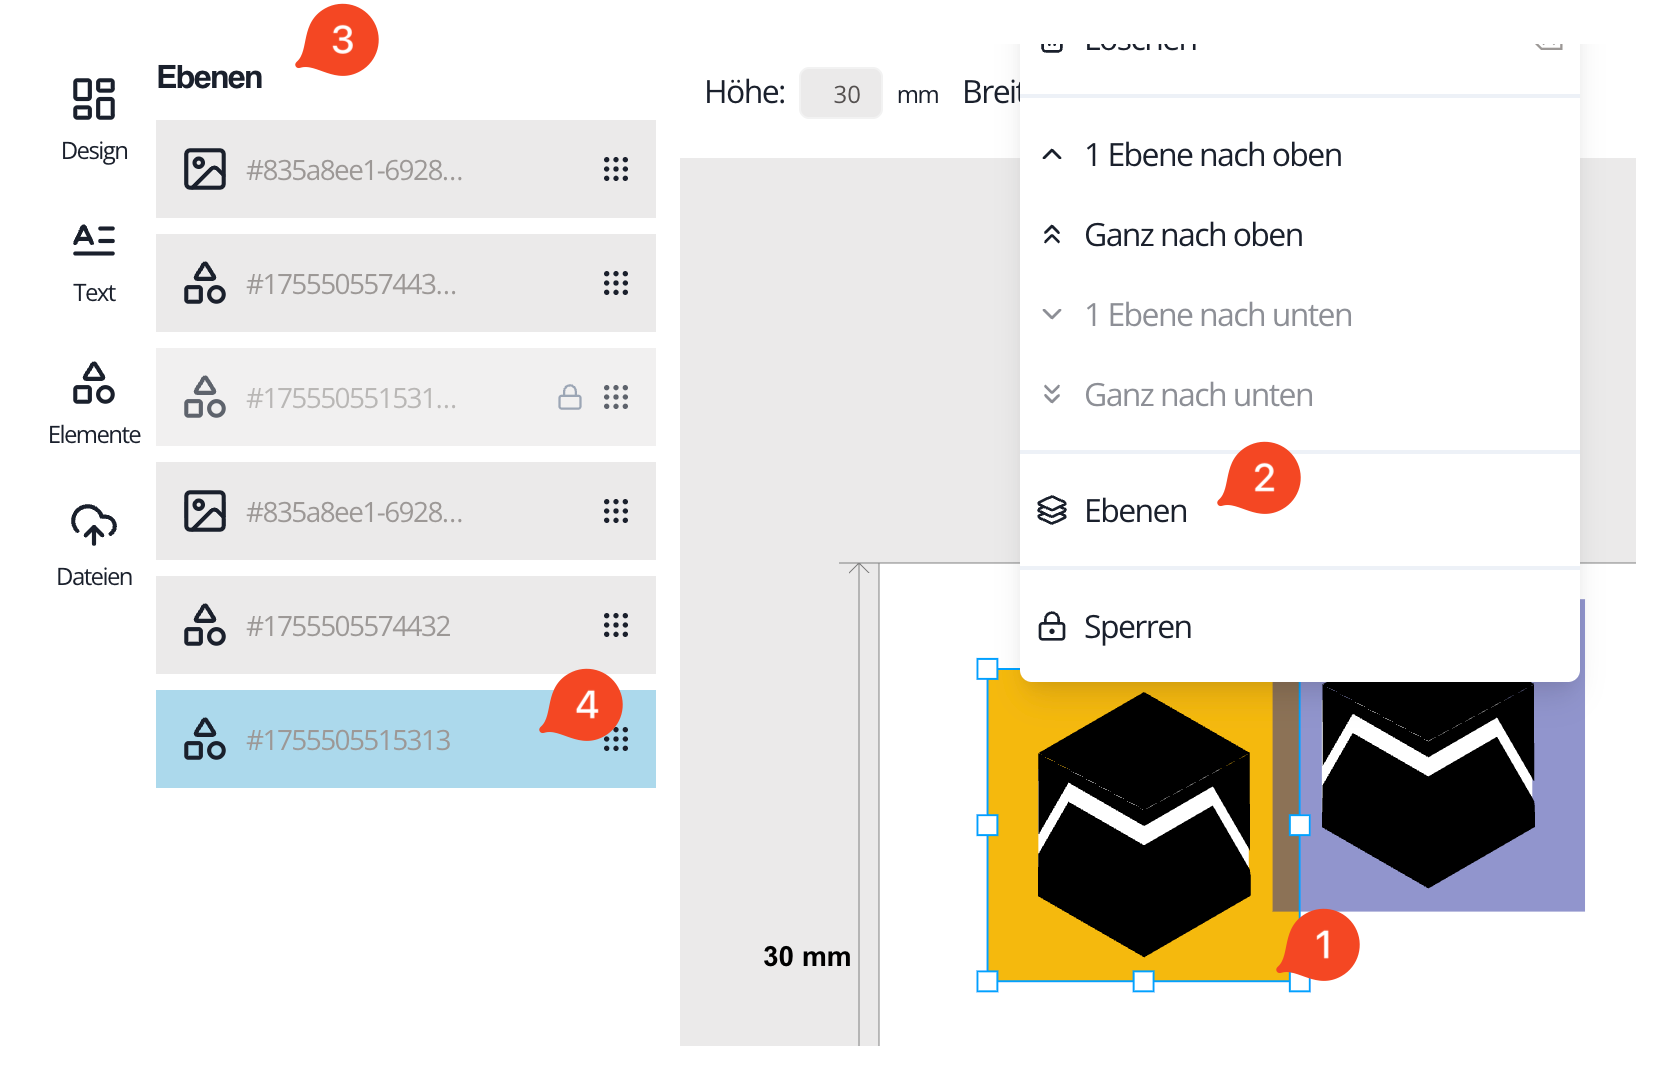
Fig. 9: Change layers
Right-click an object (1) to open the context menu. Choose “Layers” (2). The layer menu (3) appears on the left. The active layer is highlighted (4). Drag the layer to the desired position.
Locked layers are marked with a padlock and cannot be moved.