Add inspection equipment
Use the wizard to create a single item of inspection equipment or an inspection equipment group. Select the device master data, enter the item-specific details, and add calibration information, a location, and reports as needed.
Open the Inspection equipment list and select Add. To transfer multiple items from a spreadsheet, use the inspection equipment import.

Fig. 1: Creating inspection equipment: entry point, wizard, and equipment record
(1) Start creating the item in the inspection equipment list. (2) The wizard guides you through the entries. (3) Once creation is complete, Memida opens the inspection equipment record.
Workflow overview
The wizard consists of three steps:
- Master data: Select device master data, choose a single item or group, and fill in the ID no., cost center, and required additional fields.
- Adjustments: For individual items, define the calibration requirement and interval. You can add a location and description for both variants.
- Reports: For individual items, add existing inspection reports and an inspection instruction. For groups, this step is called Assign equipment.
When you select Next, Memida checks your entries, saves a draft, and opens the next step once saving succeeds. Use the step navigation to return to steps you have already reached. Clicking a step name does not save the form entries.
Step 1: Master data
Single inspection equipment or group / set
At the beginning, under What would you like to create?, choose between two options:
- Single inspection equipment: a physical item with its own inspection equipment record, inspection intervals, and inspection reports.
- Group / set: a structural container for several related items of inspection equipment. The group inherits the most critical status of its active members.
For a group, select suitable device master data or create it. Then enter the identification number, cost center, and required additional fields. In the Assign equipment step, select the inspection equipment contained in the group. A group does not have its own calibration requirement, inspection interval, or inspection reports. For detailed information, see Inspection equipment groups and sets.
For a single item, the Group field appears as soon as suitable groups are available for the selected cost center. You can use it to assign a group from the same company during creation.
Select a device
Click Select/add device to open the device master data selection. If a device is already selected, click its card to open the selection.
Search by manufacturer, device category, or model and select the matching entry. This applies the shared master data for the device model; you then enter the individual ID no., serial number, and cost center for your item.
If you cannot find a suitable entry, check the spelling first. Select Add in the selection dialog to create new device master data.
Add new device master data
If the device is not yet stored in Memida, add its master data as follows:
Add a new device to Memida
Place the cursor in the Model field and enter the device name. Afterwards, select the device type or create a new one.
Select or create a device category
If the category does not exist yet, type its name into the selection field. When no match is found, Memida offers Create followed by the category name you entered.
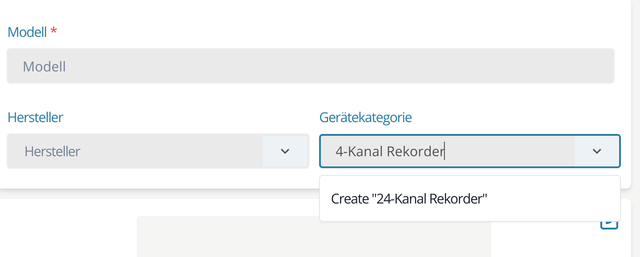
Fig. 2: Add a device category
Check that the category name is correct, then click it to create the category and insert it into the selection field.
Add a new manufacturer
If the manufacturer is missing, enter its name into the selection field. When no match is found, Memida offers Create followed by the manufacturer name you entered.
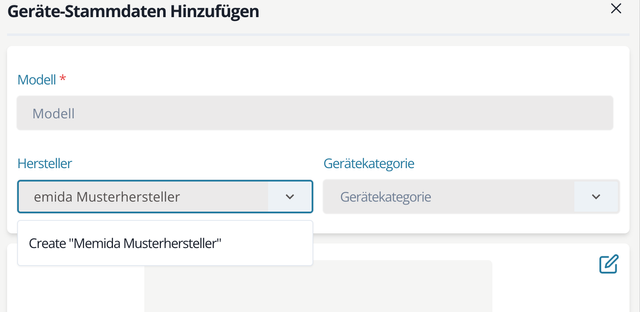
Fig. 3: Add a manufacturer
Check that the manufacturer name is correct, then click it to create the manufacturer and insert it into the selection field.
Upload a device image
You can upload a device photo in JPG, PNG, WEBP, or GIF format. The maximum file size is 32 MB.
Administrators can edit device master data via the Master data menu.
Enter inspection equipment information
Complete the details for the individual item or group:
| Detail | What to enter |
|---|---|
| Identification number | A unique ID no.. It is required and must not already be in use. |
| Cost center | An existing cost center. It is required and determines the item's company. |
| Serial number | Optionally, the serial number of the individual item. |
| Delivery date | Check the displayed date and adjust it if needed. |
| Additional fields | Complete the fields configured for your organization; additional fields configured as required must be filled in. |
If no ID no. has been entered, you can use Generate identification number. Check the number before selecting Next for the first time; the field can no longer be edited when you reopen a saved draft later.
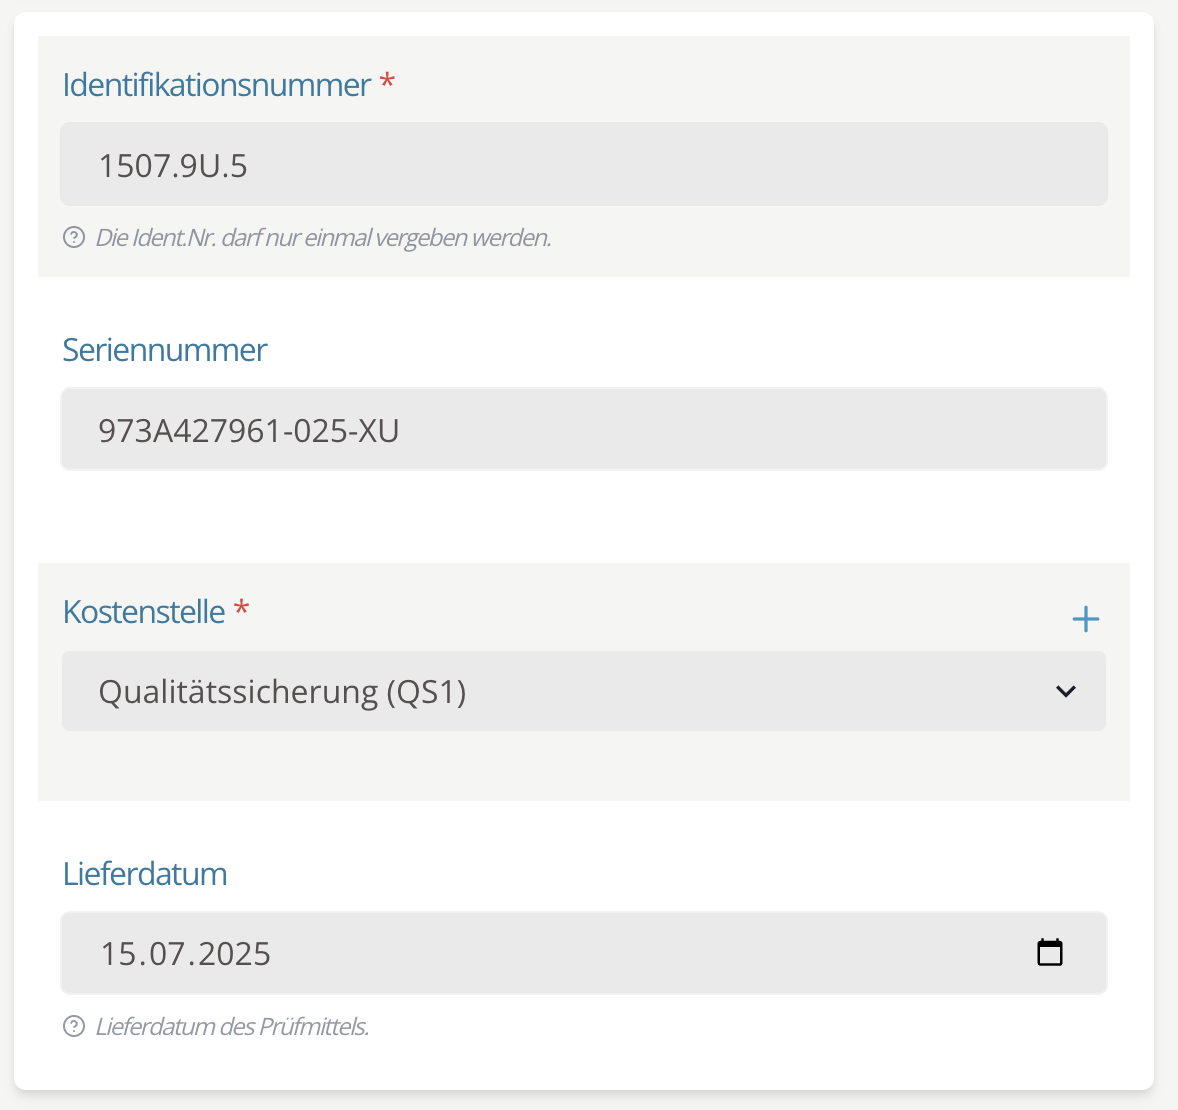
Fig. 4: Enter inspection equipment information
Device master data, an ID no., a cost center, and the required additional fields must be provided before you can proceed with Next. If information is missing or invalid, correct the highlighted fields. The next step opens only after saving succeeds.
Step 2: Adjustments
Calibration requirement, interval, and lab
For a new individual item, Calibration required is initially set to No. Select Yes if the item must be calibrated regularly. Define the Calibration interval using a number and unit, and select the appropriate calibration lab.
These calibration details are not displayed for groups. Inspection intervals and calibration labs are maintained for each individual member.
If exactly one released calibration plan with a recommended interval is available for the selected device master data, Memida uses that recommendation as a suggestion in the interval field. This requires the item to be subject to calibration and the interval not to have been edited by you yet. Manually entered and previously saved intervals are retained, even if they differ from the recommendation.
If several released calibration plans are available or the plan has no recommendation, enter the interval yourself. Also check that any suggested interval is suitable for the item and its operating conditions.
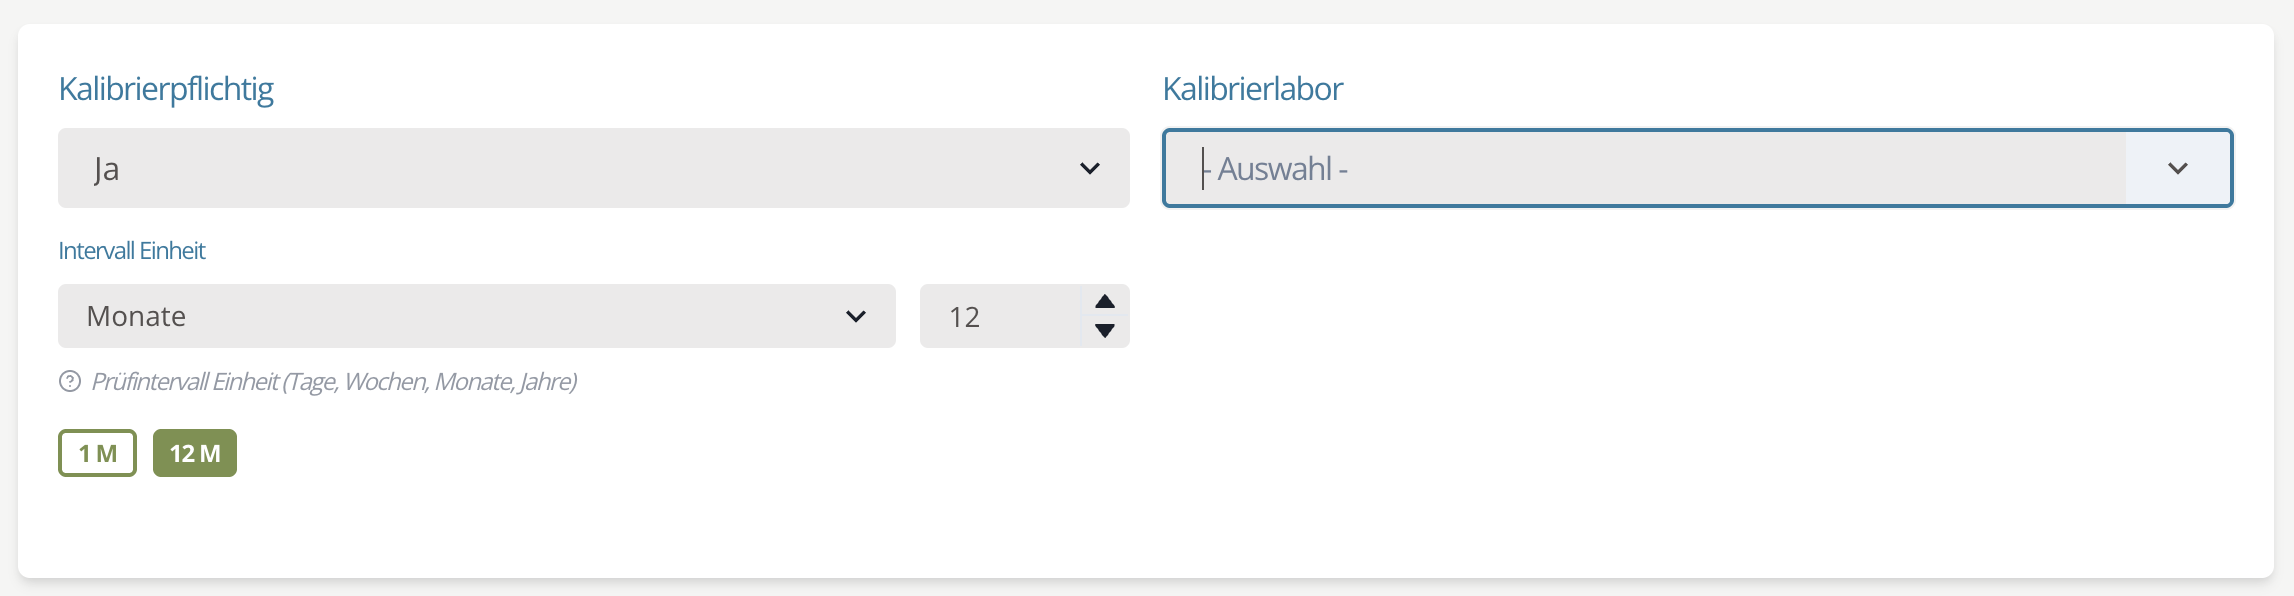 Fig. 5: Calibration details for the inspection equipment
Create a calibration lab
If the lab is missing from the list, type its name into the field to create it.
Location
Assign a site and storage location for the new item on the interactive map. Click the plus icon next to Location.
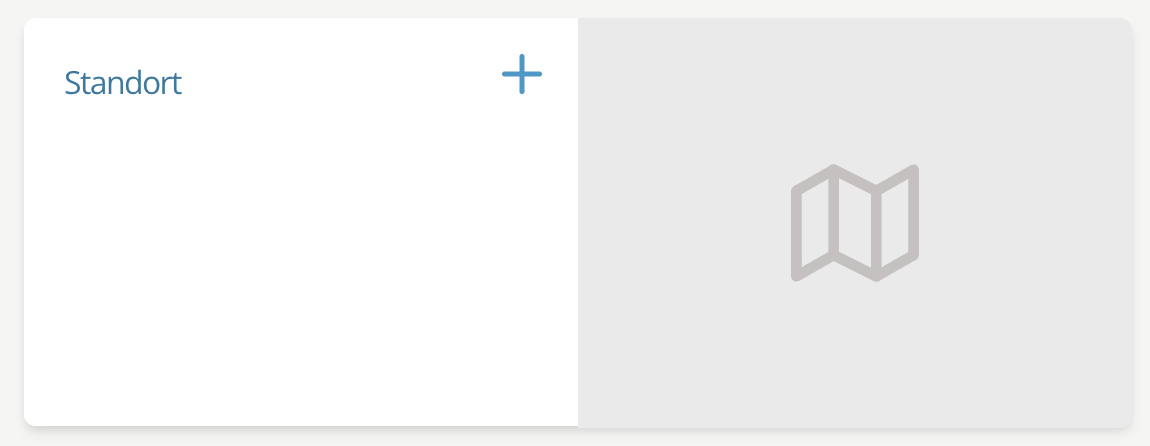
Fig. 6: Add an inspection equipment location
A dialog opens where you can pick an existing site (1) and storage location (2) or define new ones. A site can be a building, for example; the storage location describes the exact position inside. Use the actions (3) on the map to mark the site and set the precise storage location. Add further location instructions in the free-text field (4).
Available actions (3), from left to right:
Site
- Mark a building
- Draw freeform markers
- Edit markers
- Delete markers
Storage location
- Set a specific point
Search
- Search for a specific address, e.g. Spittelmarkt 10, 10117 Berlin
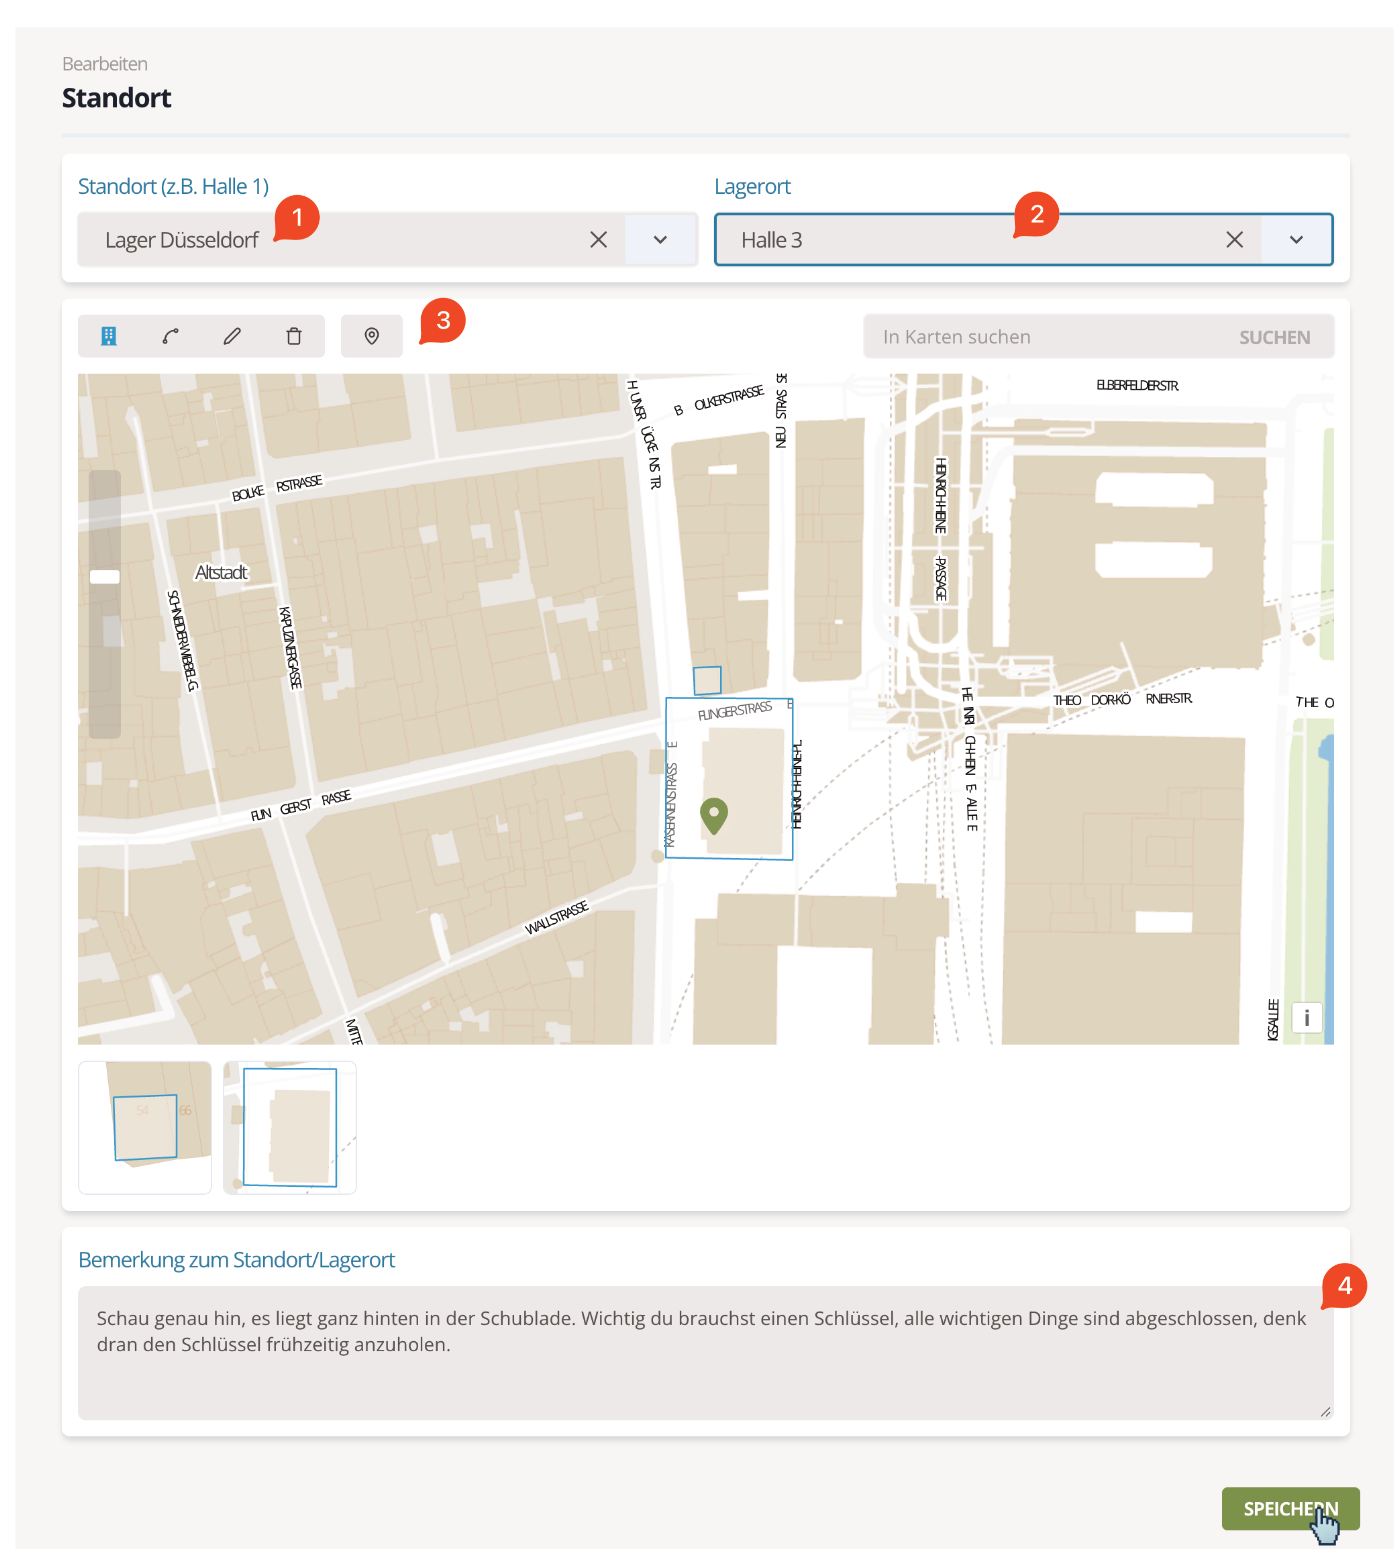
Fig. 7: Define the inspection equipment location
Click Save. The dialog closes and the new site and storage location are displayed:
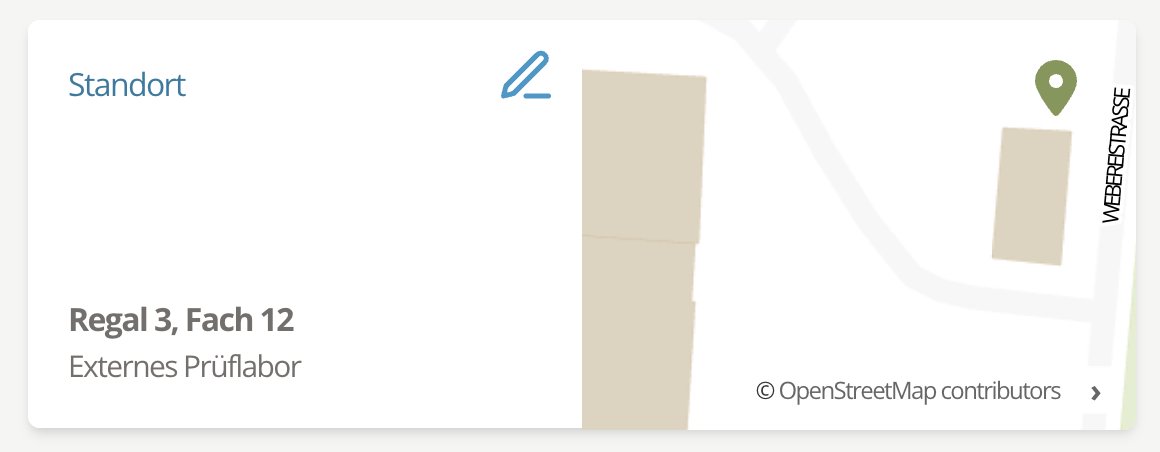
Fig. 8: Assigned inspection equipment location
Administrators can adjust sites, storage locations, and calibration labs at any time via the Master data menu.
Add a description
Optionally, enter additional information about the item or group in Description. Select Next to save the form entries and move to the final step.
Step 3: Reports or equipment assignment
Individual item: reports
Under Inspection reports, you can record existing inspections and add the associated files. Use Inspection instruction to store requirements for the inspection. Open the respective add action and save the entry in the dialog.
These details are optional. You can also finish creating the item without reports and add the supporting documents to its file later. The inspection reports guide explains the fields of an inspection report.
Group / set: assign inspection equipment
- Select Select equipment.
- Search for and select the desired members from the same company.
- Select Done to return to the overview of selected members.
- Review the selection. Select Create group to finish.
Done closes the member selection; the group is only finalized with Create group. You can also create an empty group and assign members later. Further rules are described under Inspection equipment groups and sets.
Finish adding inspection equipment
Review your entries and select Add or Create group. Once saving succeeds, Memida opens the inspection equipment record or the group details.
For an individual item, Add is already available in the first two steps. This allows you to finish early after entering the required information. If calibration should be required, complete Adjustments first; otherwise, the initial No setting is retained. Groups are finalized in the third step with Create group.

Fig. 9: From the wizard to the inspection equipment record
Resume or delete a draft
After a successful Next, the saved draft is retained even if you leave the wizard. Later, open Add again in the inspection equipment list. Memida automatically loads an existing draft and resumes at the saved step.
Changes to form fields are not saved continuously. If you leave or reload the page before selecting Next or finalizing the item, your latest changes may be lost. Switching steps through the navigation does not save these entries either. Locations, reports, and inspection instructions are edited in their own dialogs; apply changes using the save action in each dialog.
To discard a saved draft, select Delete in the wizard. Memida removes the draft and returns to the inspection equipment list. You can then start a new item with Add.
Delete removes the draft without an additional confirmation. Use this action only if you want to discard the item you started creating.