Overview
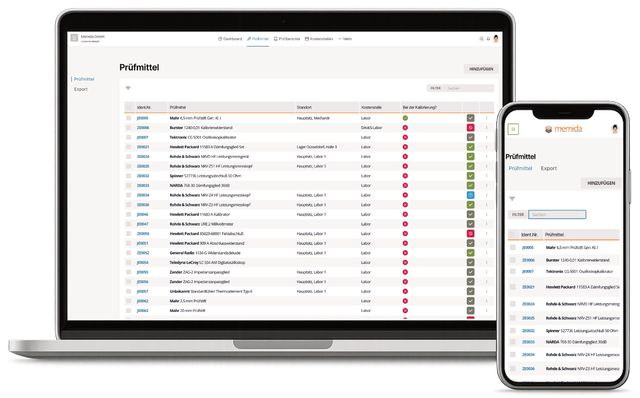
Fig. 1: Inspection equipment list
List view
Click the first column (ID no.) or the three vertical dots  and select View to open the equipment details.
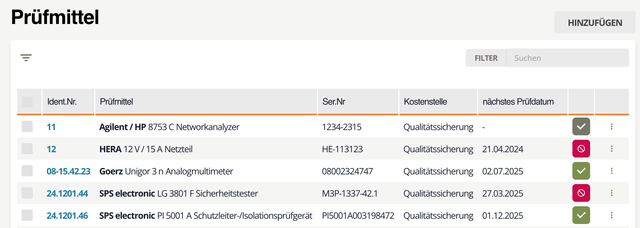
Fig. 2: Inspection equipment list
Groups and Sets in the List
Inspection equipment groups can be expanded and collapsed in the list. Their assigned inspection equipment appears indented below the group row. This keeps the individual inspection equipment files intact while making their shared structure visible.
When searching or filtering, Memida displays a matching group as context if one of its members meets the criteria. A match on the group itself does not automatically expand all members. When you select a group, Memida includes its currently visible or matching members in the selection; a subset is shown as partially selected.
Create a New Group from a Selection
- Select at least one physical item of inspection equipment from the same company.
- Open Bulk action.
- Select New group from selection and execute the action.
- Complete the group information and review the members carried over from the selection.
Existing groups cannot be selected as members of another group. For the complete rules, see Inspection equipment groups and sets.
Identify Unread Changes
A blue indicator on the left edge of a row indicates Changes since last viewed. In the detail view, you can open the history and review the highlighted changes. The unread state remains while you do so and is removed only when you leave the detail view or dismiss the New changes notice. The complete history remains available afterwards.
Unread changes are also summarized under Notices & activity on the dashboard.
Edit Inspection Equipment Directly in the List
If you have the right permissions, selected fields can be edited directly in the inspection equipment list. Open editing by double-clicking the cell. Alternatively, you can use the Tab key to move to an editable cell and open editing there with Enter.

Fig. 3: Inline editing
Depending on the visible column and permission, you can edit fields such as serial number, cost center, location with storage location, calibration lab, next inspection date, and additional fields. Selection fields apply the new value directly after selection. Text and date fields can be saved with Enter. Escape discards the edit.
For locations, the site and storage location are considered together. If the site is changed, a storage location that no longer matches is not kept. This prevents inspection equipment from pointing to a site that does not match the selected storage location.
Direct editing in the list is intended for quick corrections. For extensive changes, attachments, comments, or a complete review of the inspection equipment file, continue to open the detail view.
Lists appear throughout Memida. General list controls are described in the Usage guide.
Export the inspection equipment list
The inspection equipment list can be exported as an Excel or PDF file. The export includes the rows you select in the list. The general steps for selecting rows, choosing a format, downloading, and archiving are described in Usage guide: Export lists.

Fig. 4: Choose the export format
Use an export as a template for changes
An Excel export can be used as a starting point for bulk changes. Edit the exported file and then upload it again through the inspection equipment import. If the file contains a valid Memida ID or ID, Memida recognizes existing inspection equipment and updates the importable fields.
Create labels for inspection equipment
If you created and published label templates with the sticker assistant, you can use them to generate equipment labels.
First select all devices in the list (1) that need a label. Next, click Bulk action (top right), then Label (2), and finally Execute (3). Choose the template you want to use (4). Memida generates a PDF with labels for the selected devices.
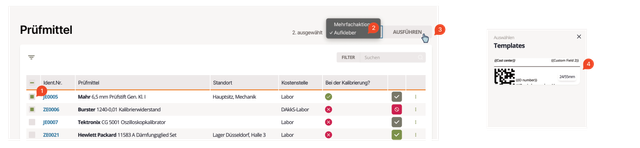
Fig. 5: Inspection equipment labels